How to Set Up Synology NAS: A Step-by-Step Guide
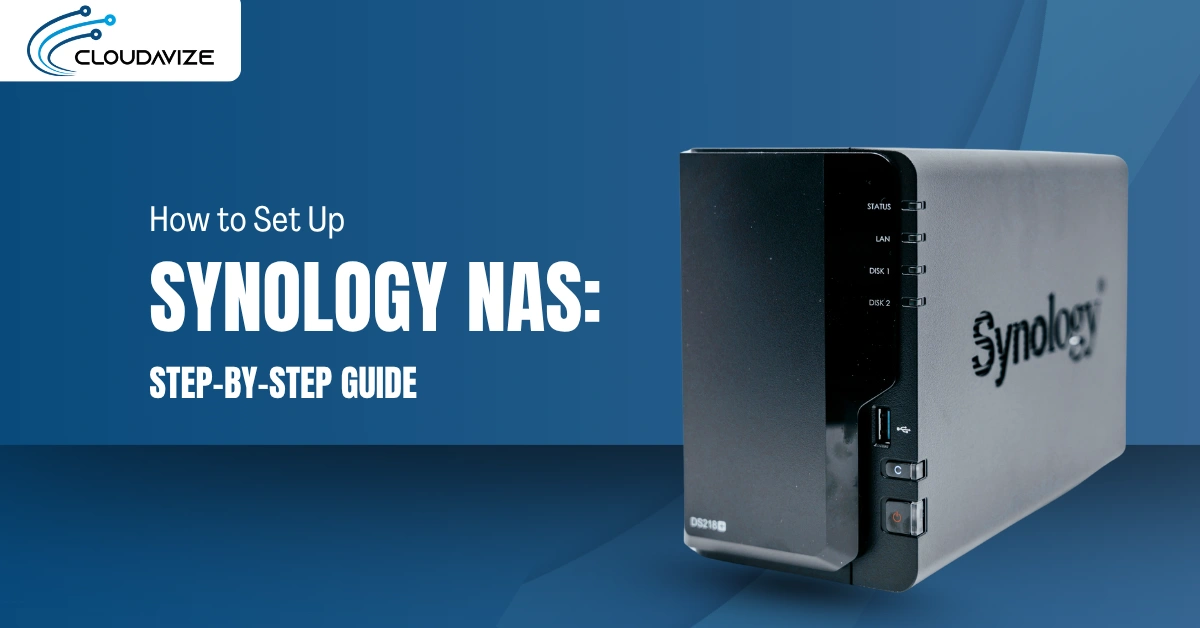
To set up a Synology NAS, connect the device to power and your local network, install DiskStation Manager (DSM), configure RAID-based storage, and secure the system for access and data protection.
A Synology NAS is a centralized file storage system that enables secure data sharing, automated backups, and multi-device synchronization. Managed through DSM, it supports user authentication, network configuration, and role-based access controls for home users and IT professionals. When properly configured, it becomes a reliable, scalable hub for storing and managing critical data.
Understanding what the NAS delivers is only part of the process. Achieving that functionality requires a deliberate, phased setup that aligns hardware, software, and network components into a cohesive system. By following each step in order, users can reduce setup errors and ensure their NAS is fully prepared for long-term performance and secure operation. The sequence below outlines the complete setup workflow from hardware preparation to full system optimization:
- Unbox and Prepare Synology NAS – Inspect components, insert hard drives, and connect the power supply.
- Install DSM (DiskStation Manager) on Synology NAS – Connect to your network, access the setup page, and complete DSM installation.
- Configure Network Settings – Assign a static IP or use DHCP, then verify network detection.
- Set Up Storage and RAID Configuration – Create a storage pool, select RAID type, initialize drives, and define volumes.
- Secure Your Synology NAS – Activate firewall, set up auto-block, enable 2FA, and encrypt shared folders.
- Set Up Data Backup and Protection – Configure local/cloud backups, schedule snapshots, and run data scrubbing.
- Set Up File Synchronization and Sharing – Deploy Synology Drive, assign permissions, and integrate cloud sync.
- Finalize DSM Configuration and Updates – Install the latest DSM version and enable automatic updates.
Step 1: Unbox and Prepare Synology NAS
Begin by unboxing your Synology NAS and checking for any physical damage or missing components such as the power adapter, Ethernet cable, and drive mounting accessories. Carefully insert the hard drives into their trays, ensuring they are properly aligned and securely seated. This step is essential for enabling correct RAID configuration and drive recognition later in the setup. Once the hardware is prepared and all parts are verified, the device is ready for power connection and DSM installation.
Unboxing the Synology NAS
Begin by placing the Synology NAS box on a stable surface. Open the package carefully to avoid damaging internal components. Inside, you should find:
- Synology NAS unit
- AC Power adapter
- RJ-45 LAN cables x2
- Hard drive tray keys and 2.5-inch hard drive screws
- Installation Guide
Check the exterior of the NAS for signs of impact or shipping damage. Confirm that all accessories are present and undamaged. Keep the original packaging in case you need to transport or return the unit later.
Checking Components and Power Supply
Next, inspect the accessories and power setup:
- Confirm that the power adapter matches your region’s voltage and outlet type.
- Examine the Ethernet cable for visible damage or bent connectors.
- Verify that all screws, drive trays, and mounting brackets are included.
Connect the power adapter to the NAS but do not plug it into the wall outlet yet. Wait until drives are properly installed before powering on the unit.
Inserting the Hard Drives (RAID Configuration Overview)
To insert a hard drive into a Synology NAS, unlock and remove the drive tray by pressing its release and pulling the handle. Place a 3.5″ drive directly into the tray, aligning the SATA connectors at the back, and secure it using the provided side panels.
For 2.5″ drives, use screws through the tray’s underside. Slide the tray back into the NAS until it clicks into place, and then with screws if needed. Power on the NAS, access DSM via browser, and use Storage Manager to initialize the drive and add it to an existing storage pool or create a new one.
At this stage, it helps to consider your RAID configuration:
- RAID 1 mirrors data across two drives for redundancy.
- RAID 5 stripes data with parity, requiring at least three drives.
- SHR (Synology Hybrid RAID) automatically optimizes space and redundancy, especially useful for mixed drive sizes.
Ensure each tray clicks into place, and confirm that all drives are firmly seated. Do not power on the NAS until all drives are inserted and secured.
Step 2: Install DSM (DiskStation Manager) on Synology NAS
After assembling and preparing the NAS hardware, the next step is to install DiskStation Manager (DSM), the operating system that powers your Synology NAS. DSM provides the interface for managing storage, access, and system operations. To begin, you’ll need to connect your NAS to the local network and access it through your browser. The DSM installation wizard will then guide you through setup, including downloading the latest version and creating admin credentials.
Connecting to Your Network
To detect your NAS and begin installation, it must be connected to the same network as your computer. A wired connection is strongly recommended to ensure setup stability.
Follow these steps to establish the connection:
- Connect the NAS to your router or switch using the included Ethernet cable.
- Make sure the NAS is powered on and shows network activity via LEDs.
- Confirm that your computer is connected to the same network subnet.
- Avoid Wi-Fi or mesh systems during initial setup to prevent detection issues.
Accessing the DSM Installation Page via find.synology.com
Once the NAS is connected, use Synology’s browser-based tool to locate it on your network. If successful, this will lead directly into the DSM installation interface.
Use this process to access the installation page:
- Open a browser and go to find.synology.com.
- Wait for your NAS to appear in the list of detected devices.
- Click “Connect” to launch the installation interface.
- If it does not appear, restart the NAS and router, then try again.
- Check that browser extensions or firewall settings are not blocking detection.
Running the DSM Installation Wizard
Once your NAS is detected via find.synology.com or Synology Assistant, follow the on-screen DSM wizard:
- After selecting your NAS device, click Set up > Install Now.
- Agree to the End User License Agreement and select the hard drives to initialize (this will erase all data), then click OK.
- DSM will download and install the latest version, and the NAS will reboot automatically. You will hear a shirt beep once done.
Completing the Setup and Creating Admin Credentials
The final configuration involves setting up access credentials and basic preferences to secure the system and enable further use.
To finalize the setup:
- Fill out your administrator account details and click Next.
- Set the update frequency you prefer. The manufacturer recommends selecting the ‘Install the latest DSM version automatically’ option for a timely update.
- Press Next and set up QuickConnect, or Skip this step and finish later
Step 3: Configure Network Settings
After DSM is installed, the next step is to configure network settings so your Synology NAS remains consistently accessible across your local environment. This setup determines how the NAS obtains its IP address, connects to other devices, and maintains a stable network identity for remote access or file sharing. The configuration can be static or dynamic, depending on how your network is managed. Ensuring proper connectivity at this stage helps avoid detection issues, IP conflicts, and accessibility failures later on.
Assigning a Static IP to Synology NAS
Assigning a static IP address prevents the NAS from receiving a new IP each time it reboots or the router restarts. This is recommended if you plan to use the NAS for remote access, mapped network drives, or port forwarding.
To set a static IP in DSM:
- Open Control Panel > Network > Network Interface.
- Select the LAN interface and click Edit.
- Choose Manual Configuration.
- Enter an IP address that is outside your router’s DHCP range.
- Set Subnet Mask, Gateway, and DNS server (e.g., use 8.8.8.8 for Google DNS).
- Click OK to save and apply the changes.
Setting Up DHCP (Dynamic IP)
Dynamic IP configuration is suitable for home networks where the IP address does not need to remain fixed. The router assigns an address to the NAS automatically using DHCP.
To configure DHCP in DSM:
- From the Network Interface window, choose Get network configuration automatically (DHCP).
- Click OK to apply the settings.
- Confirm the assigned IP in the Status tab.
Connecting Synology NAS to Local Network
Physical connectivity plays a critical role in ensuring the NAS communicates reliably with other devices. A direct Ethernet connection is optimal for speed and stability.
To ensure stable connectivity:
- Keep the NAS connected to the router or switch using Ethernet.
- Avoid powerline adapters or wireless bridges that may cause latency or packet loss.
- Check the NAS’s LAN status in DSM to confirm an active connection.
- Use a Cat 5e or Cat 6 cable to support gigabit speeds.
- Position the NAS in a location with consistent power and ventilation.
Verifying Network Connection and NAS Detection
Once your IP configuration is applied, it is important to confirm that the NAS is properly detected on the network. This ensures DSM can maintain connections and allows external apps to access the system.
To verify network detection:
- Revisit find.synology.com or open Synology Assistant.
- Confirm that the NAS is visible with its assigned IP.
- In DSM, navigate to Control Panel > Info Center to view network status.
- Run a ping test from your computer using the NAS’s IP address.
- If the NAS is unreachable, double-check cable connections and IP settings.
Step 4: Set Up Storage and RAID Configuration
After network setup, the next critical phase is configuring storage. Synology NAS uses a system of storage pools and volumes to manage disk space and ensure data redundancy through RAID (Redundant Array of Independent Disks). Whether you choose RAID 1, RAID 5, or Synology Hybrid RAID (SHR), the goal is to create a reliable, fault-tolerant storage structure. This step includes creating a storage pool, selecting a RAID configuration, setting up logical volumes for file storage, and initializing the drives for operational readiness.
Creating a Storage Pool in DSM
A storage pool is a foundational structure that combines multiple drives into one managed unit. It supports RAID for redundancy and defines how space is allocated.
To create a storage pool:
- Open Storage Manager > Storage Pool.
- Click Create Now and select the drives you want to include.
- Choose your preferred RAID type.
- Select Btrfs or ext4 as the file system type.
- Review the configuration and click Apply.
Selecting RAID Configuration (RAID 1, RAID 5, SHR)
RAID ensures data is protected in the event of a drive failure. Each RAID level offers different balances of performance, redundancy, and capacity.
To select a RAID configuration:
- Understand key differences:
- RAID 1: Mirrors data across two drives.
- RAID 5: Requires at least three drives; uses parity for protection.
- SHR: Synology’s flexible RAID supports drives of mixed sizes.
- Choose a level based on drive count and data protection needs.
- Select the RAID type when creating your storage pool.
- DSM will warn if the configuration is suboptimal.
Creating Volumes for Data Storage
After the storage pool is ready, you must create volumes to organize and store data. A volume acts as a logical partition inside the storage pool.
To create a volume:
- Open Storage Manager > Create > Create Volume.
- Choose the storage pool you set up and click Next.
- Define the volume size (or choose “max available”).
- Select the same file system used in the pool (Btrfs or ext4) and choose Next.
- Confirm the volume is mounted and ready.
- Choose whether to encrypt the volume.
- Confirm your settings and click Apply.
Initializing Drives and Performing Drive Checks
Initialization prepares your drives for operational use and helps prevent early disk failures. Running health checks ensures reliability before storing any data.
To initialize and test the drives:
- Open Storage Manager and locate each installed drive.
- Run a S.M.A.R.T. test (Quick or Extended) for each drive.
- Check for warnings or bad sectors.
- If any drives show signs of failure, replace them before continuing.
- Confirm that all drives are healthy before file sharing begins.
Step 5: Secure Your Synology NAS
Once your storage is set up, securing the NAS becomes a priority. A properly configured NAS should not only store data but also defend it against unauthorized access, brute-force login attempts, and local vulnerabilities. This stage focuses on enabling the firewall, configuring automatic IP blocking, setting up two-factor authentication (2FA), and encrypting sensitive shared folders. These steps work together to ensure that both external and internal threats are minimized, protecting the system and its users.
Enabling Firewall Protection
The built-in DSM firewall helps control which IP addresses and ports can access your NAS. It forms the first line of defense against external intrusion.
To enable and configure the firewall:
- Go to Control Panel > Security > Firewall.
- Check Enable firewall.
- Add rules to allow or deny traffic from specific IP addresses or regions.
- Apply profiles for services like SSH, FTP, or DSM access.
- Click Apply to activate your rule set.
Configuring Auto-Block for Failed Login Attempts
Auto-block prevents brute-force attacks by temporarily banning IPs after repeated failed login attempts. This helps deter automated intrusion scripts.
To enable auto-block:
- Navigate to Control Panel > Security > Protection > Auto Block.
- Check Enable Auto Block.
- Set a threshold (e.g., block IP after 5 failed attempts in 10 minutes).
- Review and manage the list of blocked IPs under the Block List tab.
- Use the Allow List to exempt trusted IPs.
Setting Up Two-Factor Authentication (2FA)
Two-factor authentication adds a second verification step, reducing the risk of compromised credentials. This is highly recommended for admin accounts.
To set up 2FA:
- Log in to DSM and go to Personal > Security > 2-Factor Authentication.
- Follow the wizard to scan the QR code using an app like Google Authenticator.
- Confirm the 6-digit code from your app.
- Enter the code into the text field and select Next.
- Confirm the Backup e-mail settings and click Send verification email.
- Check your mailbox and click the link to verify.
- Once it returns to the setup wizard, click Done to complete the setup.
- Use backup codes and store them safely.
Enabling Encryption for Shared Folders
Encrypting shared folders protects sensitive data from unauthorized access, especially if the drives are removed or compromised.
To enable folder encryption:
- Go to Control Panel > Shared Folder.
- Select the folder you want to protect and click Edit.
- Under the Encryption tab, select Encryption.
- Set a strong encryption key (passphrase).
- Download the encryption key file via Encryption > Export Key and store it securely.
Step 6: Set Up Data Backup and Protection
After securing the NAS, the next priority is protecting your data from loss or corruption. Backups ensure you can recover files in case of accidental deletion, hardware failure, or ransomware attacks. This step involves configuring scheduled backups to local and cloud destinations, enabling Snapshot Replication for fast recovery, and running data scrubbing to monitor drive integrity. Together, these tools help maintain long-term data resilience and system stability.
Configuring Backup Schedules for Local and Cloud Backups
Backups can be sent to external drives, another Synology NAS, or cloud platforms. Regular scheduling ensures critical data is consistently protected.
To configure backup schedules:
- Open Hyper Backup from the DSM main menu.
- Click Create > Data backup task, then choose a destination such as Synology C2 Storage, an external USB drive, or another Synology NAS.
- Select the source folders and DSM applications to back up.
- Configure backup rotation (Smart Recycle or custom versioning policy).
- Set a schedule (daily, weekly).
- Enable data encryption and transfer compression if needed.
- Confirm and run the first backup manually to validate the setup.
Setting Up Snapshot Replication for Data Protection
Snapshots capture the state of your data at specific intervals, allowing rapid restoration in case of file corruption or loss. Replication adds a second layer by copying snapshots to another NAS.
To set up Snapshot Replication:
- Go to Snapshot Replication in DSM.
- Choose a shared folder or LUN to protect.
- Click Create to launch the Replication Wizard.
- Under Destination Synology NAS, enter the IP address or QuickConnect ID of the remote NAS.
- Authenticate with an account on the destination NAS that has sufficient privileges.
- Select the destination shared folder for replication.
- Set a snapshot schedule (e.g., every hour, daily).
- Complete the wizard and monitor the task under the Task List.
Running Data Scrubbing for Drive Health
Data scrubbing scans and verifies the integrity of stored data, checking for disk errors and RAID inconsistencies. It helps prevent silent data corruption.
To run data scrubbing:
- Open Storage and click the storage pool you want to perform data scrubbing on.
- Navigate to the Data Scrubbing section and click Run Now. Or, set the schedule for running data scrubbing by selecting the frequency and time grid.
- Choose Save.
- Let the process complete without powering off the NAS.
- Review the results in the health report.
Step 7: Set Up File Synchronization and Sharing
Once your data is protected, the next step is to ensure it is accessible and shareable across authorized users and devices. Synology provides tools like Synology Drive and Cloud Sync to allow real-time file synchronization and remote collaboration. You can also configure permission-based access to shared folders for specific users or groups. These features make the NAS function as both a secure storage hub and a dynamic file-sharing environment across platforms.
Setting Up Synology Drive for File Sync
Synology Drive enables multi-device file synchronization and versioning, similar to cloud platforms like Dropbox or Google Drive. It keeps files consistent across PCs, mobile devices, and NAS users.
To enable file sync with Synology Drive:
- Open Package Center and install Synology Drive Server.
- Launch the Synology Drive Admin Console.
- Head to the Team Folder section and press Enable.
- On your computer, download and install Synology Drive Client from Synology Download Center.
- Open the Drive Client and click Start Now.
- Enter your NAS address (IP or QuickConnect ID), account name, and password to connect.
- Choose Sync Task > Next.
- Choose My Files or Team Folder depending on your sync target.
- Set the sync direction: Two-way, NAS to local, or local to NAS.
- Define the local path and NAS folder to sync.
- Review versioning and schedule settings, then click Done to begin synchronization.
Configuring File Sharing and Permissions
For secure collaboration, configure shared folders with permission rules to control which users or groups can read, write, or manage content.
To configure folder sharing:
- Go to Control Panel > Shared Folder.
- Create a new folder or edit an existing one and click Edit.
- Under the Permissions tab, assign access rights per user or group (Read/Write, Read-only, No access).
- Use Advanced Permissions to limit file deletion or download rights.
- Enable Access via SMB, AFP, or WebDAV, depending on your network clients.
- Click Save and verify access using test accounts.
Integrating Cloud Sync for External Backup
Cloud Sync extends your NAS by mirroring or syncing data with external cloud services. It supports major providers and lets you manage sync direction and scope.
To set up Cloud Sync:
- Install Cloud Sync from the Package Center.
- Open the app and choose a cloud service (e.g., Dropbox, Google Drive, OneDrive).
- Sign in and authorize access to your cloud account
- Choose the local NAS folder and the remote cloud folder you want to sync.
- Set sync direction (NAS to cloud, cloud to NAS, or bidirectional).
- Configure filtering rules for file types and schedule sync timing.
- Confirm settings and monitor sync logs for errors or conflicts.
Step 8: Finalize DSM Configuration and Updates
To maintain system performance, compatibility, and security, it is essential to finalize the configuration of DiskStation Manager (DSM) and ensure your NAS is running the latest software version. Synology provides simple tools to check for updates, install new releases, and enable automatic patching. Finalizing these tasks helps minimize vulnerabilities and supports the ongoing reliability of your NAS environment.
Checking for DSM Updates
You can manually check for available DSM updates to ensure the system is operating with the latest features and security enhancements. This is especially useful for administrators who prefer to review updates before installation.
To check for updates:
- Log in to DSM as an admin.
- Go to Control Panel > Update & Restore.
- Click the DSM Update tab to check the current version.
Installing the Latest DSM Version
Installing updates ensures that your system benefits from the latest DSM features and patches. The process is straightforward and designed to preserve data integrity throughout.
To install a DSM update:
- If a new version is available, you will see a message at the bottom of the DSM Update section.
- Click Download.
- Once downloaded, click Update Now.
- Follow the on-screen prompts and confirm reboot if necessary.
- Wait for the system to complete the update and restart.
Configuring Automatic Updates for Security
Enabling automatic updates is the easiest way to ensure your Synology NAS stays protected without manual intervention. This feature installs critical patches as soon as they are released.
To enable automatic updates:
- Navigate to Control Panel > Update & Restore.
- Click on Update Settings.
- Check the box for Automatically install important updates.
- You can also schedule update times for low-usage hours.
- Save the settings to apply changes.
Common Troubleshooting Tips
If your Synology NAS encounters issues during setup or regular use, several common problems can usually be resolved with basic checks. Addressing these early prevents misconfiguration, improves reliability, and ensures successful operation across the network, RAID, and DSM layers.
- NAS not detected on the network
- Check that the NAS and computer are on the same local network.
- Ensure the Ethernet cable is properly connected and the NAS has power.
- Use find.synology.com to detect the NAS.
- Restart the router and NAS if detection fails.
- Incorrect IP configuration
- Open DSM via browser and navigate to Control Panel > Network.
- Assign a static IP to avoid DHCP conflicts.
- Verify that the selected IP is outside the DHCP range of your router.
- RAID setup fails, or drives not recognized
- Make sure drives are listed under Storage Manager > HDD/SSD.
- Replace any drive showing a warning or abnormal S.M.A.R.T. status.
- Reinitialize the drives if prompted during setup.
- Use identical-capacity drives for RAID 5 to avoid wasted space.
- DSM installation errors
- Ensure the NAS is connected to the internet for DSM downloads.
- Clear browser cache or try a different browser for installation.
- Reboot the NAS and rerun the installation wizard if stuck.
- File sync not working
- Confirm Synology Drive Client is up-to-date.
- Re-authenticate login credentials in the desktop client.
- Make sure the “Team Folder” is enabled in Synology Drive Admin Console.
- Clear the sync queue if the client is stuck on indexing.
- Insufficient permissions or access issues
- Go to DSM > Control Panel > Shared Folder > Permissions tab.
- Ensure the user has at least read/write access.
- Double-check group policies that may override individual permissions.
- Verify encryption passwords if accessing encrypted folders.
- Time/date mismatch or SSL errors
- Enable NTP under Control Panel > Regional Options > Time.
- Set the correct time zone and sync with a trusted time server.
- If using HTTPS, ensure DSM’s certificate is valid and updated.
How Expert IT Support Can Simplify Your Synology NAS Setup and Optimization?
Expert IT support simplifies your Synology NAS setup by handling technical configurations, ensuring system security, and preventing common setup errors. Professionals efficiently configure RAID, assign static IPs, install DSM, and manage permission settings tailored to your network. This expertise ensures that your NAS is correctly integrated into your environment from the start, minimizing downtime and reducing risks tied to misconfiguration or incomplete setup.
Partnering with a trusted provider like CloudAvize adds value beyond setup. We offer ongoing monitoring, storage optimization, and backup and data recovery planning tailored for your industry. Our team of IT professionals also proactively manages and drives health, firewall settings, and remote access controls to secure sensitive information. By offloading these responsibilities, you can save time and minimize operational risks while maintaining a high-performance, secure NAS environment.
Frequently Asked Questions
What Should I Do if Synology NAS Fails to Connect to the Network?
If your Synology NAS fails to connect to the network, start by inspecting physical and basic network settings. A methodical check can often resolve connectivity issues without needing advanced intervention.
Follow these steps:
- Ensure the Ethernet cable is firmly connected to both the NAS and the router.
- Confirm the NAS is powered on and that status LEDs are active.
- Make sure your NAS and computer are connected to the same local network.
- Restart both the NAS and the router.
- Visit find.synology.com to auto-locate the device, or try accessing it via its IP address.
- If detection fails, consider setting a static IP in DSM or reviewing router DHCP settings to resolve conflicts.
How Can I Access My Synology NAS Remotely?
You can access your Synology NAS remotely using QuickConnect, DDNS, or a VPN, depending on your security and access needs. Each method enables remote connectivity while offering different levels of control.
Here are the most common options:
- QuickConnect: Enable it in Control Panel > External Access > QuickConnect, and log in with your Synology account.
- Dynamic DNS (DDNS): Useful for assigning a consistent web address to your NAS even if your IP changes. It requires port forwarding on your router.
- VPN Access: The most secure option, allowing encrypted communication with your NAS through a private network.
- 2FA: Regardless of method, enable Two-Factor Authentication for safer remote logins.
Can I Add More Drives to My Synology NAS After Setup?
Yes, Synology NAS supports storage expansion if your model and RAID type allow it. This flexibility helps scale storage without disrupting existing data.
To expand your NAS:
- Insert compatible drives into available bays.
- Launch Storage Manager in DSM.
- Choose to either add to an existing storage pool or create a new volume.
- If using expandable RAID types like RAID 5 or SHR, follow the on-screen instructions to safely increase capacity.
- Always back up critical data before initiating changes.
How Do I Ensure Data Protection on Synology NAS?
You can protect your data using a combination of scheduled backups, snapshots, and disk health monitoring, all built into DSM.
Here is a recommended protection stack:
- Hyper Backup: Automate backups to external drives, another NAS, or cloud services such as Synology C2, Dropbox, or Google Drive.
- Snapshot Replication: Create point-in-time versions of folders, allowing fast recovery from accidental deletions or ransomware.
- Data Scrubbing: Periodically run scrubbing tasks to detect and fix data inconsistencies on Btrfs or SHR volumes.
- Backup Testing: Regularly test restore functions to verify backup reliability.
What is the Default Username and Password for DSM?
The default login for DSM uses the username admin and a blank password, but these should be changed immediately to secure your system.
After the initial login, go to Control Panel > User, select the admin account, and create a strong, unique password. For added protection, disable or delete the default admin account and create a new administrator profile with a custom username. It is also highly recommended to enable Two-Factor Authentication (2FA) to prevent unauthorized access and strengthen login security.